|
|
Post by cfesmire on Sept 14, 2014 23:35:00 GMT 1
Some wild and crazy stuff Sam, you are without a doubt one of a kind (in a good way)
|
|
|
|
Post by cfesmire on Sept 14, 2014 23:33:24 GMT 1
Very nice,and I liked the way the m75 turned out too. I'll be seeing George in the future and am going to get the story on what a guy needs to do to get his pieces. His A'cars are top notch.
|
|
|
|
Post by cfesmire on Sept 11, 2014 20:08:39 GMT 1
Agreed, great looking stuff Thomas. Always liked the Alloy Forms A'car.
|
|
|
|
Post by cfesmire on Mar 23, 2014 15:42:46 GMT 1
How about the accessory packages? Is there any idea if/when they may be reissued? Several (mostly the wheel and mirror) are no longer available.
|
|
|
|
Post by cfesmire on Mar 23, 2014 15:13:41 GMT 1
Hi all, been a while and I thought the board could use some new material. I went to the Amherst Rail show in Springfield, Mass. this year again and had the pleasure of sitting with the 1/87 vehicle club crew. Several folks wanted to take photos of their trucks in my barn interior diorama. They turned out pretty good but I realized it just isn't large enough for large trucks. So I promised Joe Enriquez that I would do something bigger for his spectacular trucks for next year. Couldn't wait, and here's what I came up with. 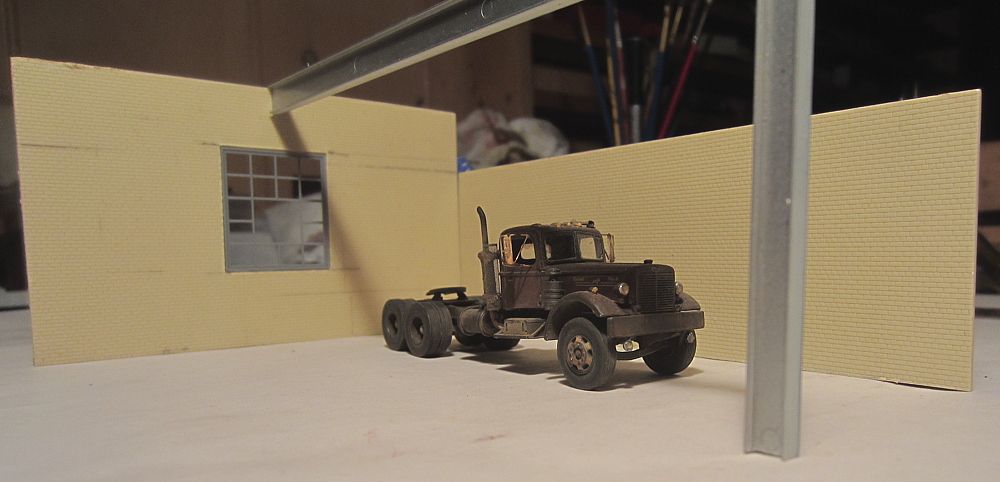 I used the same formula as for the barn with just two walls that would afford me a wide variety of camera angles. Starting with Evergeen styrene in a brick pattern and sheet styrene for the floor, I cut everything to size and installed the windows and door from Tichy. I decanted spray can satin black into the airbrush and gave everything a coat. Then I mixed cheap acrylic craft paint with Windex in Terra Cotta and Crimson Red and shot the walls followed by a coat of flat clear lacquer when dry. To that I applied a mixture of gray powdered artists chalks dissolved in alcohol, buffed with a paper towel when dry and hit it again with the clear flat lacquer. The windows and door were hand painted Ivy Green. I got the look you see here. 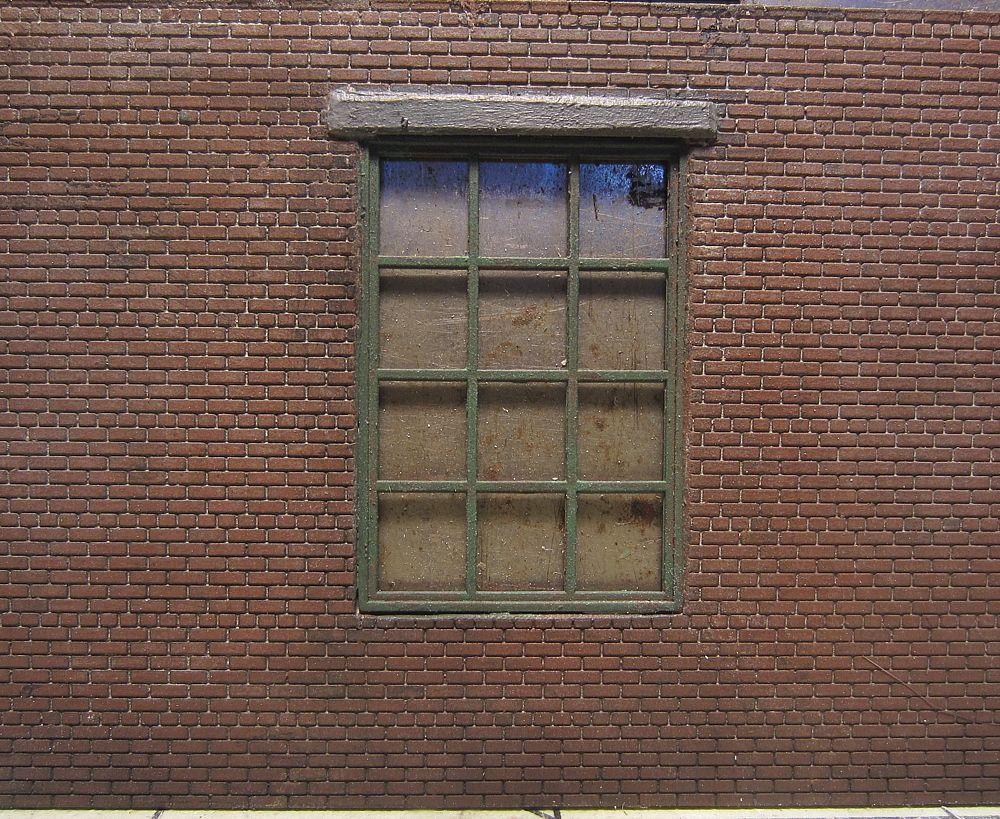  My attention then turned to the floor, already black. Expansion joints were scribed and it was shot with the acrylics in gray, tan, and black again mixed with Windex for the airbrush. A coat of clear flat lacquer and when dry, a variety of acrylic washes for stains on the floor. 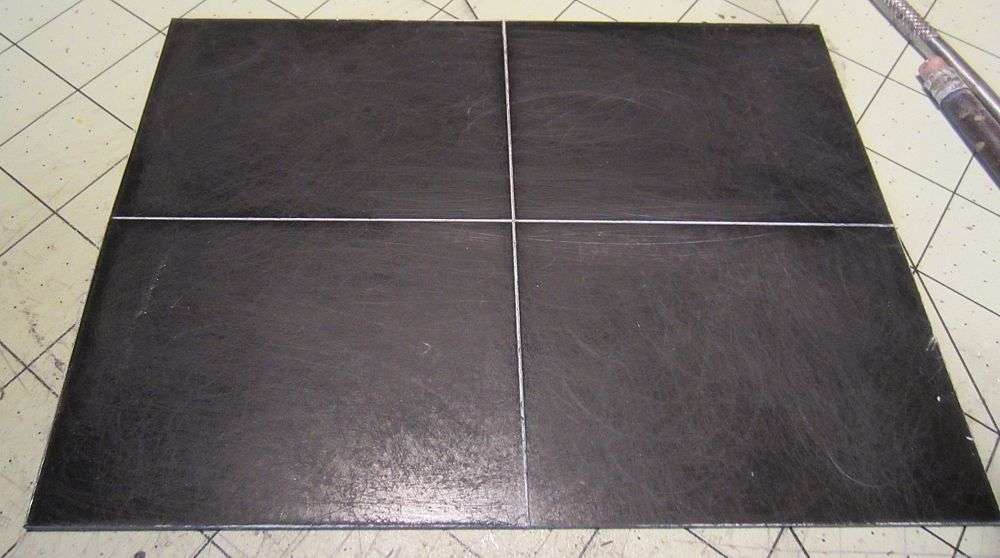 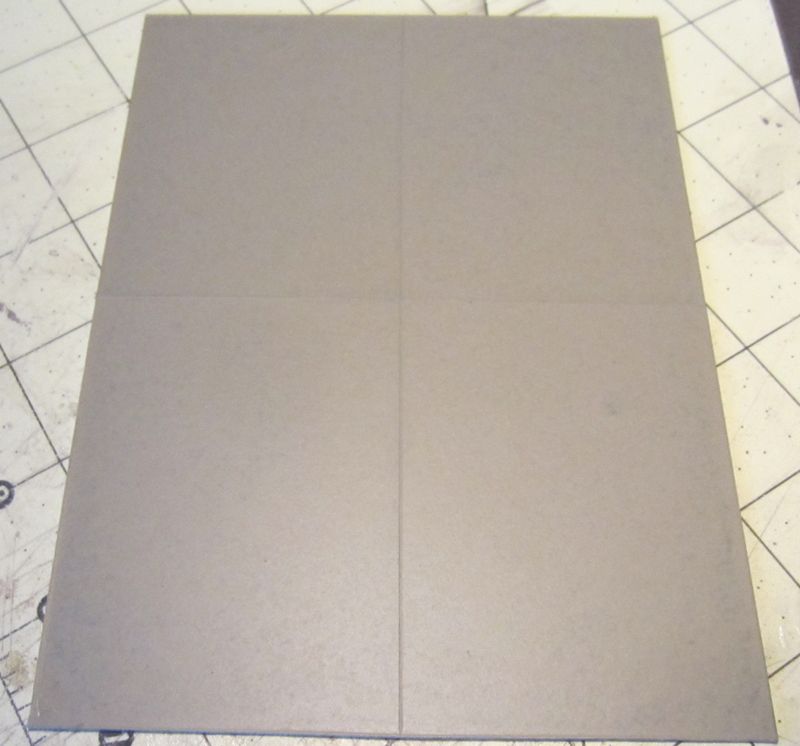  I glued a styrene L channel to the bottom of the floor and then the walls to it. 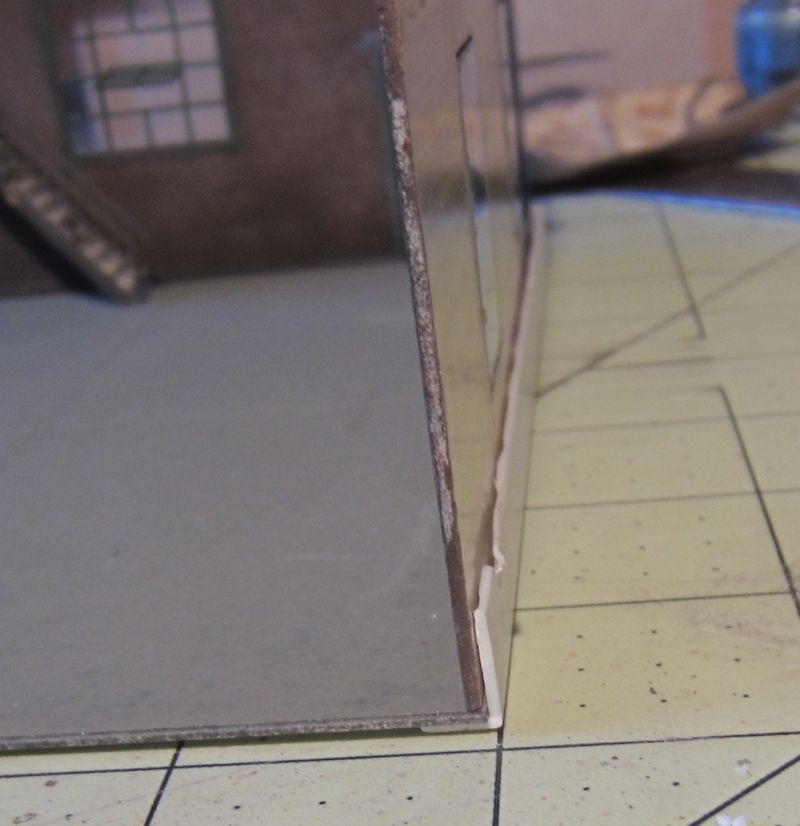 It was then a matter of dry powdered chalks to blend and add color, and work on detailing. I added a small storage loft with stairs. The detailing was fastened with MicroScale Liquitape. It is a glue that you paint on, let dry and it gives anything a tacky surface. Everything can be removed/repositioned without leaving glue marks. 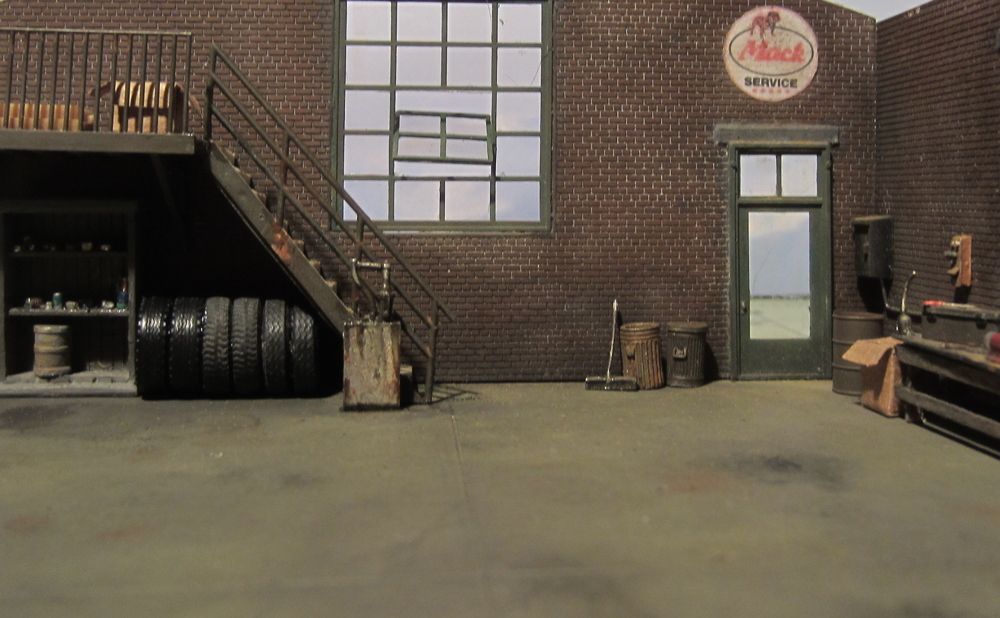  I notched the walls and some I beam styrene to make a roof system that is keyed to the walls so I don't have any posts to obstruct the camera view. 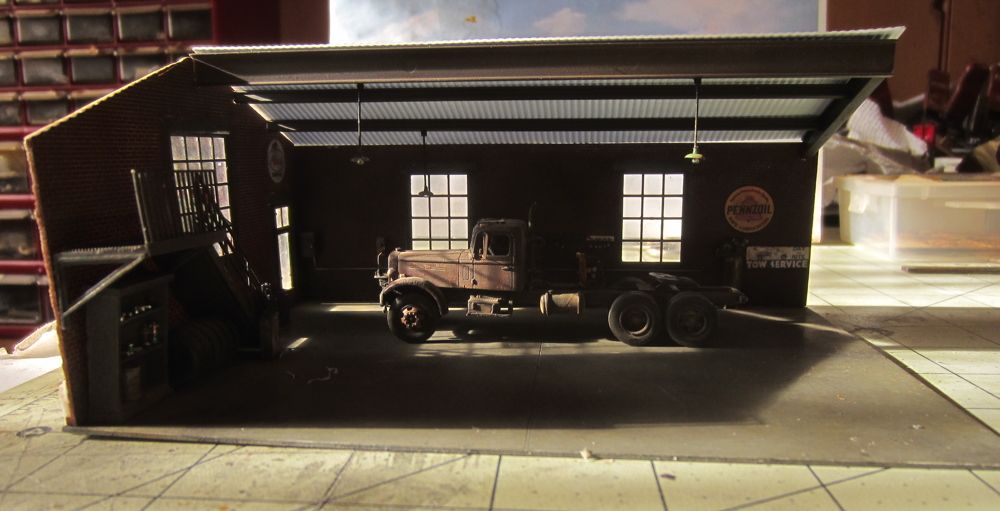 And some final shots of how vehicles will look. The large windows give some interesting light sources. 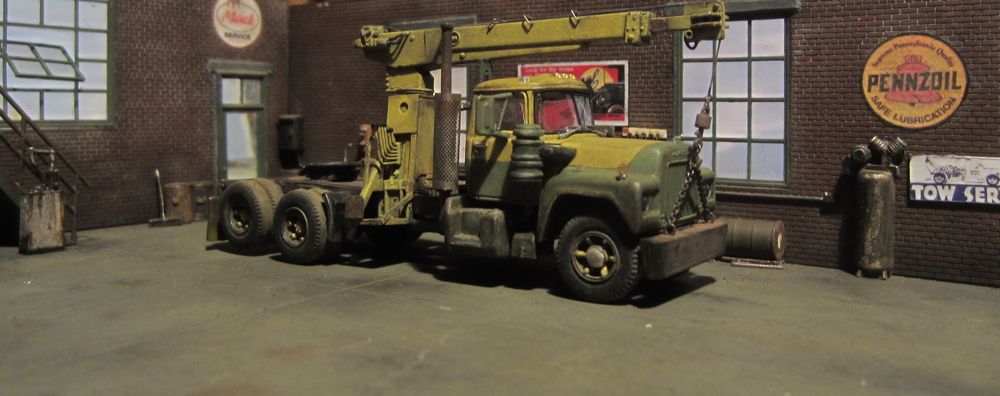 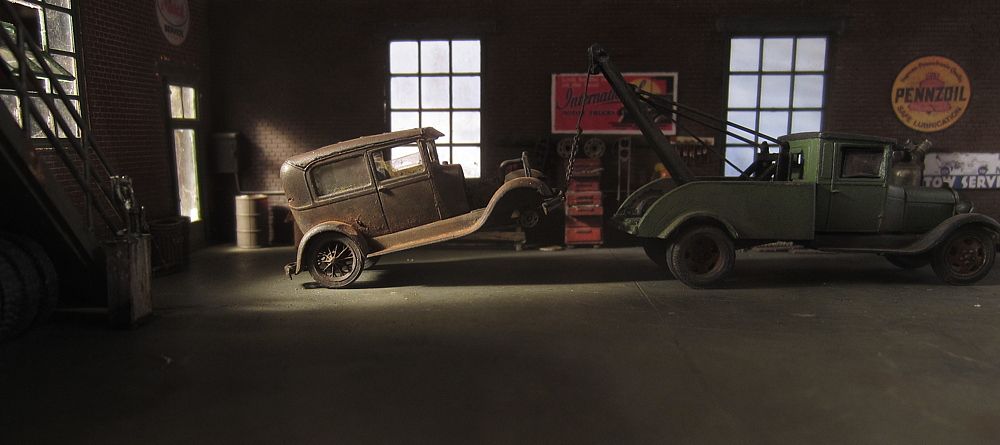 |
|
|
|
Post by cfesmire on Feb 26, 2014 23:09:37 GMT 1
You all have seen this barn interior before but I noticed when photographing my latest build, the Jordan Ford TT, I had a spider contributing to the dilapidated look of the barn and had to share it. 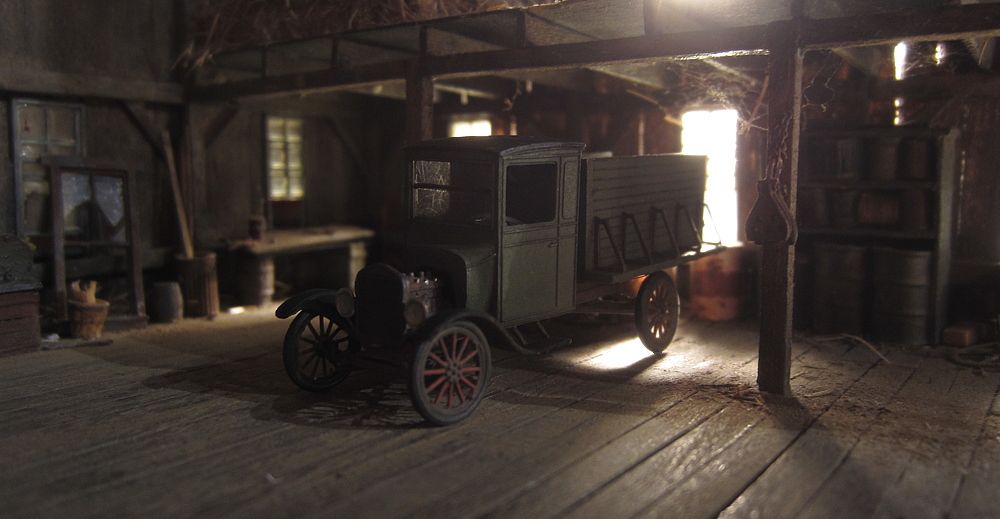 |
|
|
|
Post by cfesmire on Jan 23, 2014 0:59:10 GMT 1
Have any idea what tire fits these? And I don't speak/read German, I wonder if someone could direct me to a page that I might place an order? Thanks guys.
|
|
|
|
Post by cfesmire on Nov 23, 2013 15:01:07 GMT 1
I have always used Liquitape from Microscale for temporarily holding things together during the build process. But I found it is an excellent way to hold clear acrylic or styrene windows in place. You simply coat the window opening and let it dry. Then place your "glass" in place and it adheres nicely without fear of getting a wet glue on your clear glass. So far I have models done a year or so ago that still have glass intact.
|
|
|
|
Post by cfesmire on Oct 26, 2013 14:49:19 GMT 1
Very nice casting, crisp lines and details.
|
|
|
|
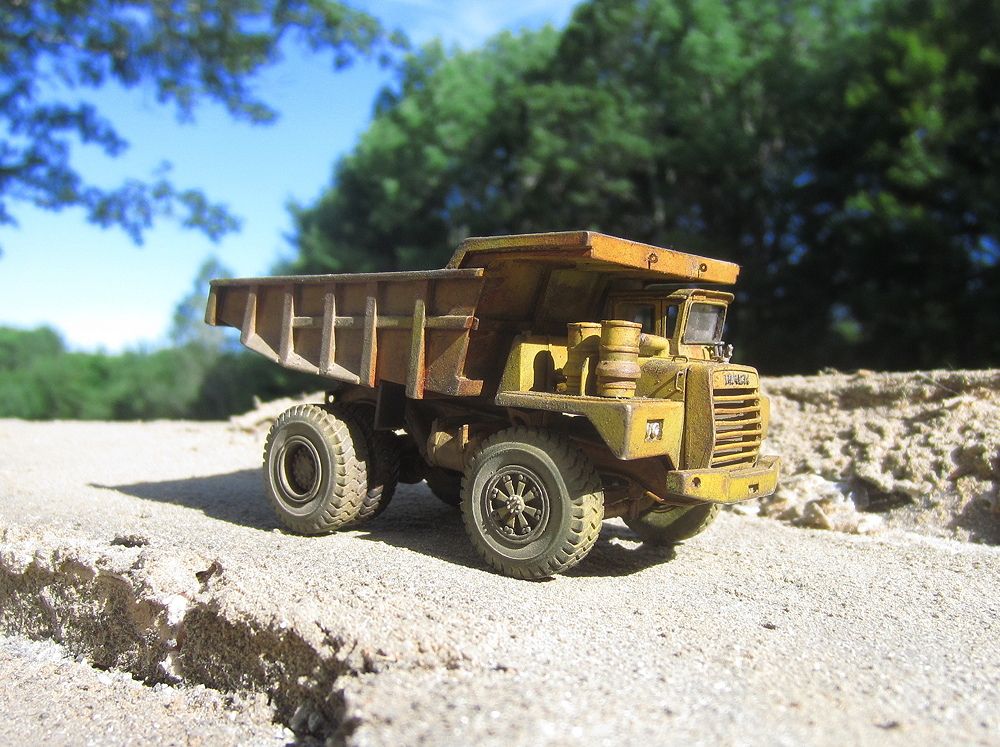
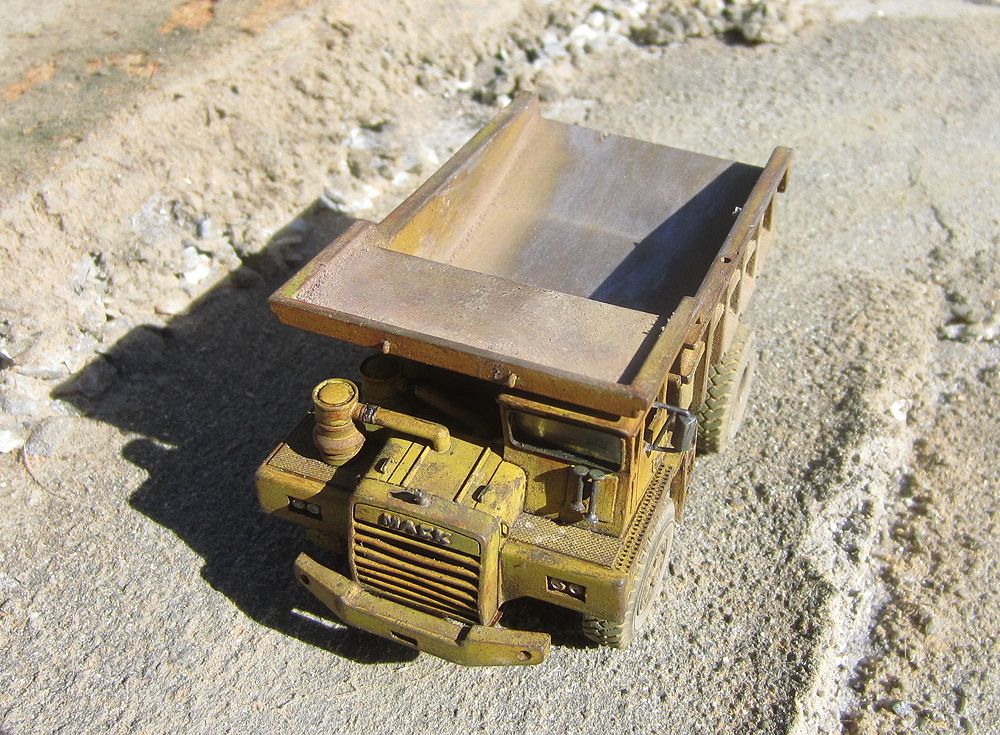
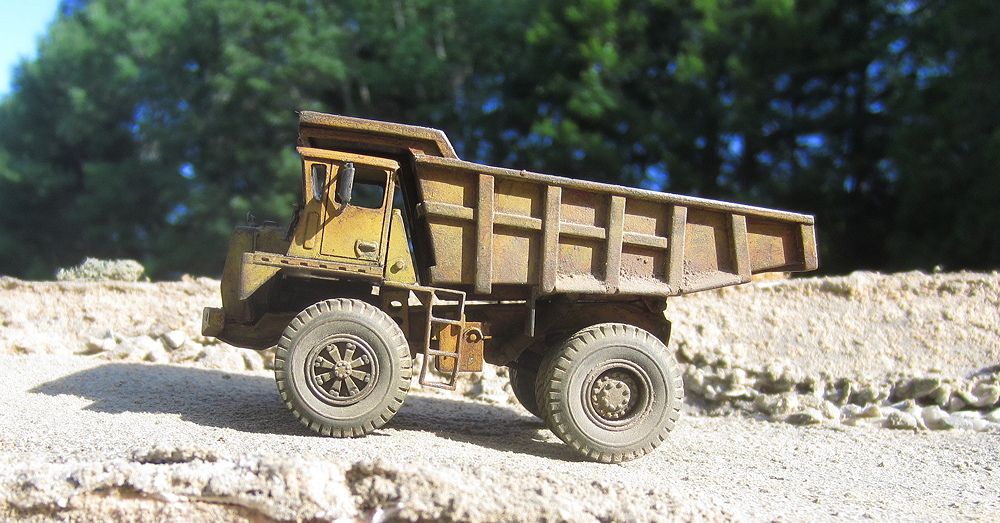
Post by cfesmire on Oct 13, 2013 13:27:09 GMT 1
Something shiny here. Took the Imex Peterbilt and cut the windshield area out, added a scratch built radiator and grille and a dump body from Ralph Ratcliffe. The Alcoa wheels are from a Don Mills kit. 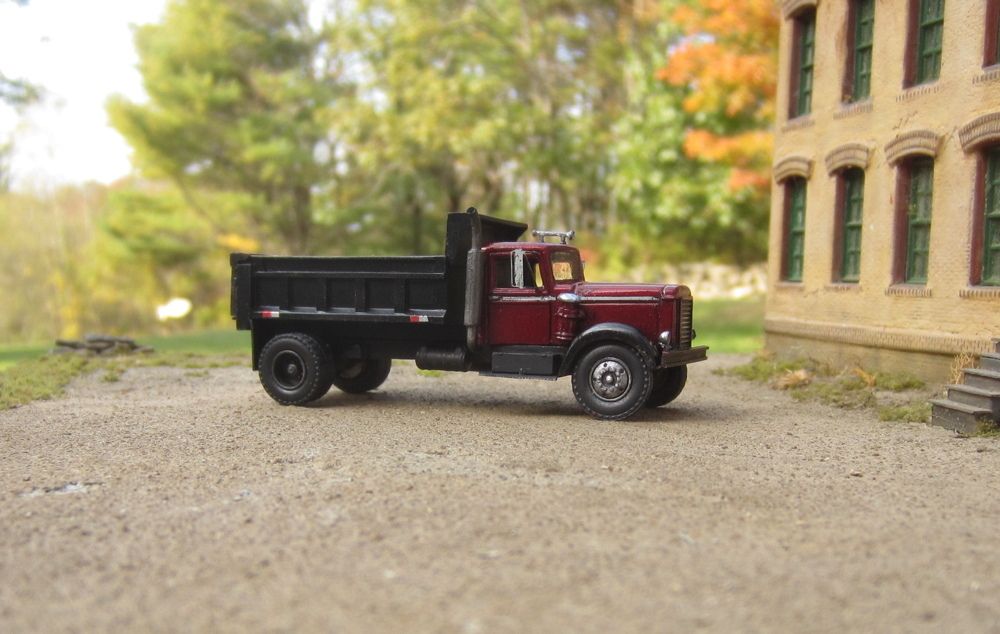 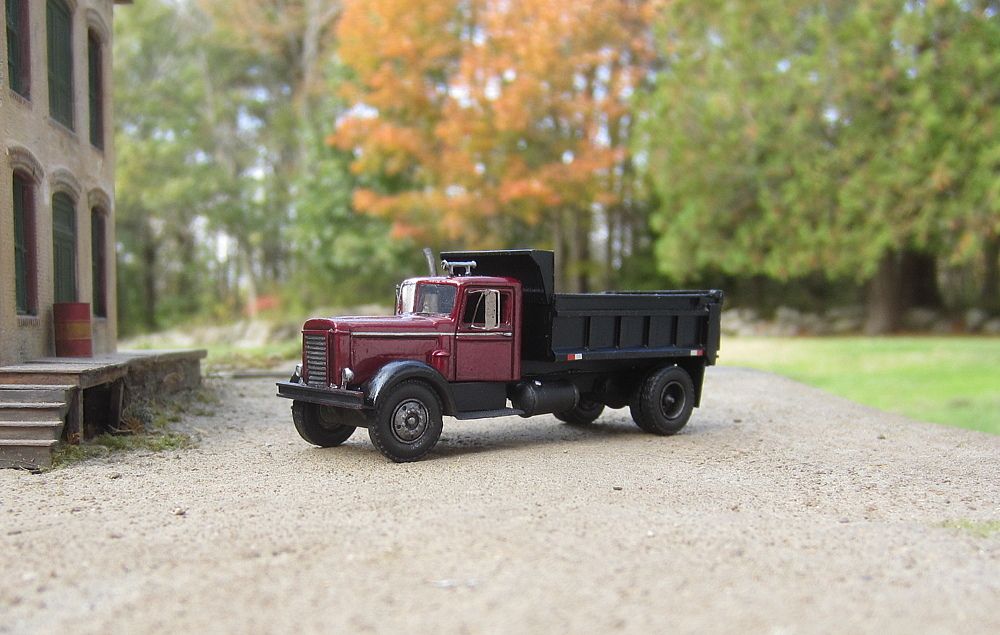 |
|
|
|
Post by cfesmire on Aug 23, 2013 22:54:01 GMT 1
Wow, nice job scaling down the shovel.
|
|
|
|
Post by cfesmire on Aug 7, 2013 16:58:31 GMT 1
|
|
|
|
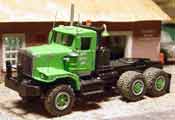
Post by cfesmire on Aug 7, 2013 16:53:34 GMT 1
The orange one with the single axle and a 55 ton rating would be the M55. Ralph sells the M65 and the twin screw M75. I'll be posting some photos of the M65 in my completed thread. If you know the capacity (GVW) of the M series Mack in question, then you automatically know it's model #.
|
|
|
|
Post by cfesmire on Jul 14, 2013 17:14:40 GMT 1
I noted that the Dodge truck shown from Matchbox is one of the few that is quite close to 1/87 (I believe 1/86) so I made this one into a race car transporter with a scratch built bed. The 55 Chevy is a Malibu piece. 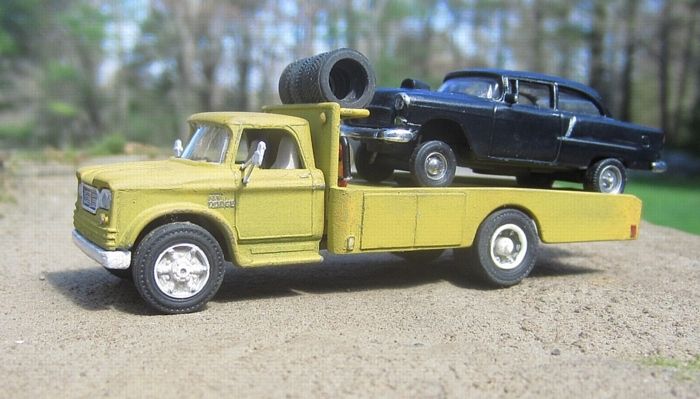 One more here in the 1922 Packard truck from Jordan. I decided to leave the bed off so one can see the unique and detailed running gear of the Packard. I also attempted to build the Packard Single Six, exposed here. 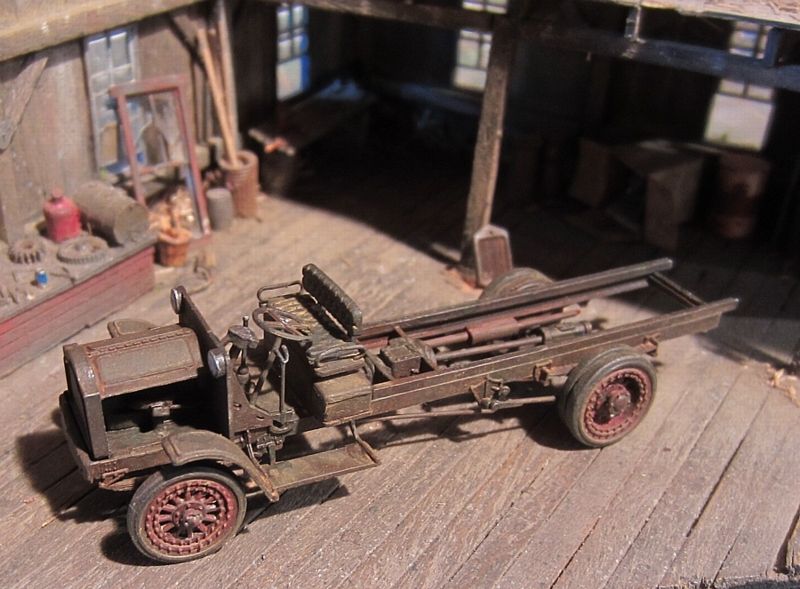 |
|
|
|
Post by cfesmire on Jul 14, 2013 17:01:02 GMT 1
A little Sylvan piece in the mid 40's Chevy, I placed the stake bed from the Jordan Model TT truck on the back. Added the hoops and torn canvas cover. 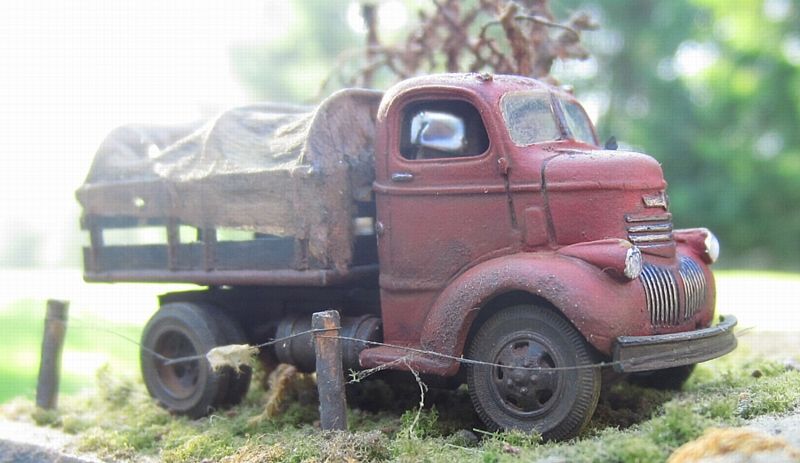 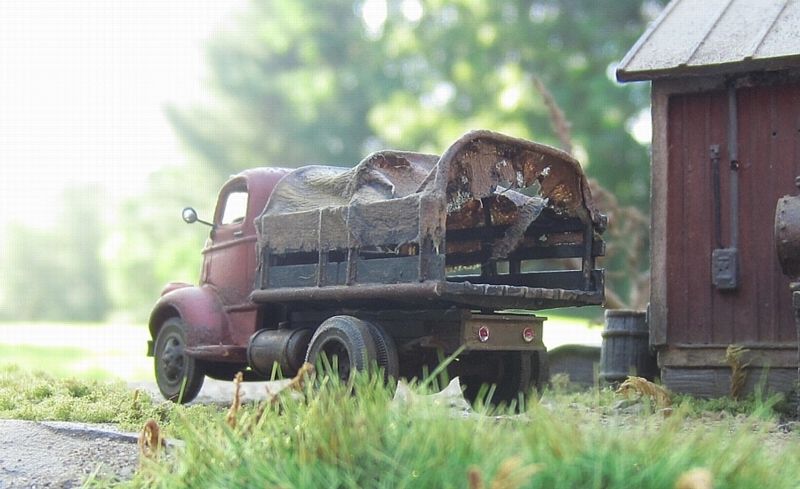 |
|