Lee
Senior Member
Posts: 1,899 
|
Post by Lee on Nov 22, 2007 2:44:30 GMT 1
Just so anyone interested who wants to see how we do the second part of the molding: The first shot is the mold removed from the little plastic container that we now use for mold boxes. The numbers were embedded in the mold and had to be removed. Also all the clay is removed without moving the model within the mold.  Next the mold is put back in the plastic box upside down. Tape is used to raise the the top so we can add rubber. The mold is then sprayed with mold release so the new rubber doesn't stick to the old rubber.  The second part of the mold has now been poured and is curring. The mold should be ready for casting by Friday. ;D |
|
|
|
Post by DavidJohnson on Nov 22, 2007 13:01:59 GMT 1
Lee,
Thankyou for posting. The molding process photos are really interesting. And most of all, I am looking forward to the model ;D
Dave
|
|
|
|
Post by jackfitz1944 on Nov 22, 2007 15:53:10 GMT 1
So the masking tape is enough to hold the rubber. Post a photo when you get the bottom poured, I'd like to see what it looks like.
|
|
Lee
Senior Member
Posts: 1,899
|
Post by Lee on Nov 24, 2007 3:12:46 GMT 1
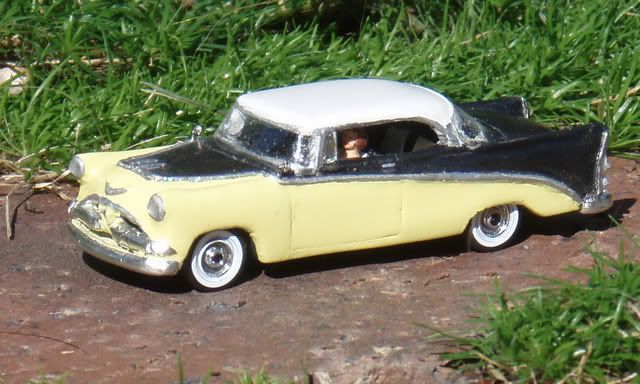
In this photo the '41 is on the left after the second pour. I put a paper towel over the molds while they are curing overnight. The paper towel stuck to the mold. Not a problem. The two molds in the middle are two more new pieces and the mold on the right is for any extra rubber that we have left over during a pour. Yes, there is something in the forth box that we are molding. A piece of sidewalk in this case. 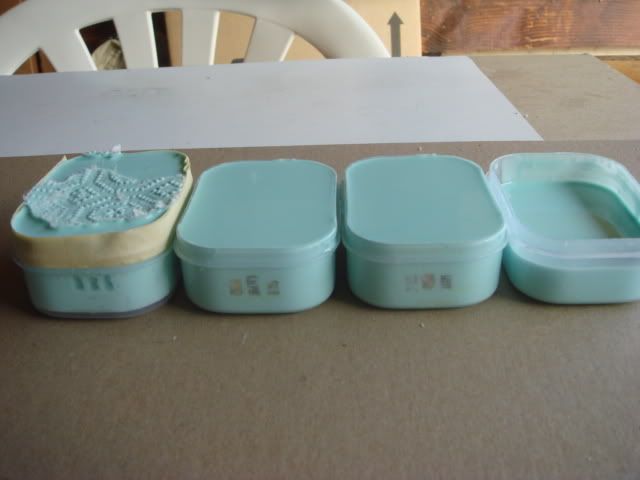 The tape is removed but the mold is still in the plastic box 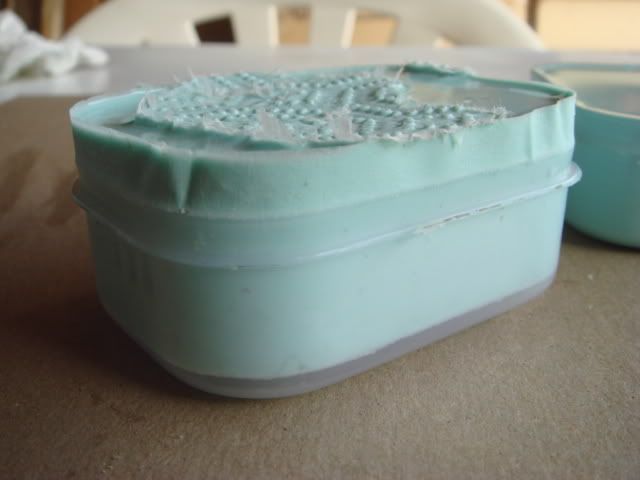 The lid or top of the mold removed 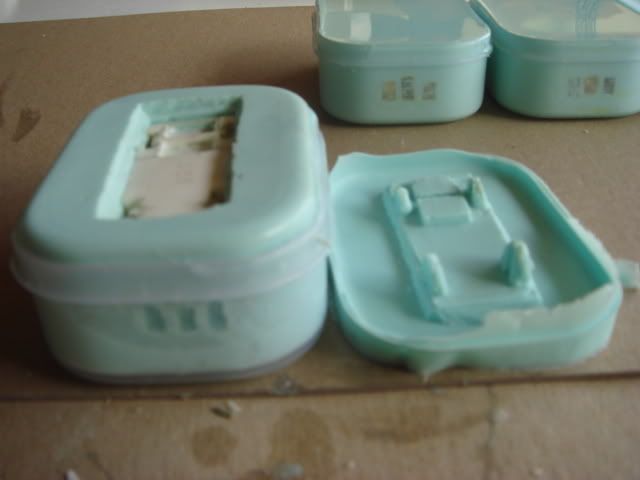 The master has been removed and sits on the right. The outer edges of the cover have been trimmed and three holes punched into the lid to let the air escape. 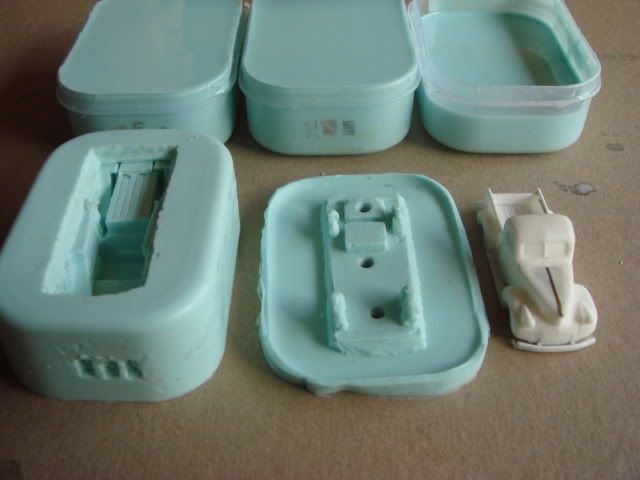 First casting  Jack's three wishes will be mailed out tomorrow, Saturday.  |
|
skunk
87thScale addict
5th B-day
Posts: 2,762
|
Post by skunk on Nov 24, 2007 6:32:36 GMT 1
Love the play-by-play. What do you use to punch the holes?
|
|
|
|
Post by jackfitz1944 on Nov 24, 2007 17:23:32 GMT 1
Thanks Lee and Jerry, I 'll make the truck a prioity to get finished. I have been busy with work and other things and haven't much time for models. Jack
|
|
Lee
Senior Member
Posts: 1,899
|
Post by Lee on Nov 25, 2007 5:39:41 GMT 1
Love the play-by-play. What do you use to punch the holes? I take a piece of aluminum tubing and sharpen the end with a number 11 blade by twisting the it around the inside of the tubing. I have a small pair of needle nose pliers that I hold the other end with. While holding the tubing and pushing down, I turn the mold around in a circle. When the mold is easy to turn, the tubing has cut through. It only takes a couple of seconds to do it. Jerry and I are getting up in years and will not be around forever. I wish to see others get involved with model making and molding as we will never be able to do it all. I have been more than willing to pass on any and all the little tricks that I have learned, either from others or from doing a little thinking. Received a package from Christian that contained, among other things, some of the fantastic resin casting pieces that is being done in Europe. They look as good as any plastic injection molding that I have seen. How they do it is beyond me.  |
|
|
|
Post by sonic on Nov 26, 2007 18:31:02 GMT 1
Love the play-by-play. What do you use to punch the holes? Received a package from Christian that contained, among other things, some of the fantastic resin casting pieces that is being done in Europe. They look as good as any plastic injection molding that I have seen. How they do it is beyond me. Hi, you mean something like this? www.rst-resinsupertech.de/index.htmlKurt |
|
Lee
Senior Member
Posts: 1,899
|
Post by Lee on Nov 27, 2007 2:04:51 GMT 1
Yes, like that. Except what I was sent was a frame and flat bed for a two axle truck plus a small bus body like Jordan's.
We use a soft rubber that has a lot of flex when making our molds. There are harder rubbers available but then I would have trouble removing the bumpers, etc without breaking them. We went to the little plastic boxes for mold making to give us a thicker sidewall in the mold. Some of the old molds with narrow sidewalls can bow out if I am not careful.
|
|
|
|
Post by superba on Dec 1, 2007 1:22:05 GMT 1
Guys:
Continue to make my life easier, first it was the clay concept to help make hollow casting, now you have an easy way to make mold boxes.
I have been an idiot for several years building cardboard boxes using card stock and masking tape.
Thanks guys
|
|
Lee
Senior Member
Posts: 1,899
|
Post by Lee on Dec 5, 2007 2:50:25 GMT 1
Don't feel bad. We did the same thing for a long time until the light bulb over our head lit up. ;D I don't know if they are nation wide, but we go to the 99 cent store to look for supplies such as alum foil and plastic boxes. Much cheaper than the regular store prices.
|
|
|
|
Post by superba on Dec 23, 2007 1:07:56 GMT 1
Sprayed WD-40 in latex molds then wiped out. Poured in the hydroshrink. Pulled out the hydroshrink master in less than 10 minutes.................came out perfect!
The best results I have ever had.......thanks Lee and Jerry!
|
|
Lee
Senior Member
Posts: 1,899
|
Post by Lee on Dec 27, 2007 1:34:46 GMT 1
You are most welcome Joe. Thank you for sharing the Hydroshrink product with all of us. A most interesting tool.
|
|
|
|
Post by sonic on Mar 29, 2009 13:02:56 GMT 1
Hi folks, no new posts on this thread? Bad news, the hydroshrink is no longer available....
Kurt
|
|
skunk
87thScale addict
5th B-day
Posts: 2,762
|
Post by skunk on Mar 30, 2009 19:51:03 GMT 1
Hi folks, no new posts on this thread? Bad news, the hydroshrink is no longer aviable.... Kurt Really? It might be true, last time I went to the Compleat Sculptor (I believe that they are the ones making the stuff) they only had one 1-gallon tin left, and nothing in smaller quantities. Maybe I should buy it and divide it into smaller containers. |
|