|
|
Post by cfesmire on Jul 25, 2007 13:28:12 GMT 1
I have been getting some comments on vehicle tires lately (on another forum) and wanted to get some input from you all about how to get the tires to look more realistic where they meet the road. Large scale modelers sometimes sand the tires flat on the bottom but I think it looks like just that, sanded flat tires. And I've tried heating them but can't get consistent results. Any ideas??
|
|
Lee
Senior Member
Posts: 1,899 
|
Post by Lee on Jul 26, 2007 1:19:42 GMT 1
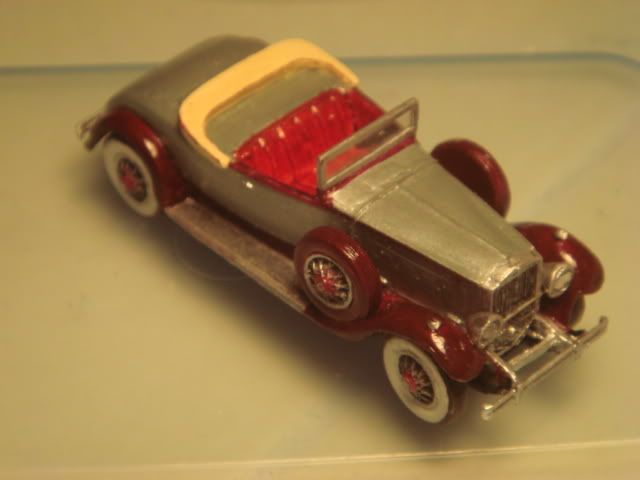
Interesting nitpicking subject Chester.  My small bit of knowledge is that truck and bus tires are inflated to something like 125 lbs. They wouldn't show any loading effect if the vehicle is empty or even with a lite load. Heavy loads and wheels going over a raised object would cause the bottom of the tire to compress and the sidewalls along the bottom to bulge out. Car and other lite vehicles would be more apt to show this effect. Now the question is how to duplicate this effect in 1/87 scale. Very simple Chester. Just fill the vehicle with lead. The weight of the lead should compress the tires. Another way might be to run a screw up through the display base into the model and pull the model down by tightening the screw.  Me, I'm happy if all the wheels are touching the road without any light showing underneath them. Now to be serious. This is just the thing that Jerry and I got into resin casting for. If we had one tire that looks great, we would make a mold and cast more. We could even do a set of tires in various stages of going flat if we had masters for them. Look again a this picture. Look at the tires:  I am going to have to take a better picture of the tires. |
|
lordrusty
Novice
 Me and my adopted rescued racehorse, "Lord Rusty"; aka: "Rusty".
Posts: 5
|
Post by lordrusty on Sept 6, 2007 19:10:24 GMT 1
I've not tried this yet, but might I suggest heating the bottom of the tire? I know they're small ... okay ... tiny, but a reducing directional tip for a heat gun just may do the trick. This my heat/paint stripping gun, the conical accessory tip you can buy for it, and below that an extension made from rolled and shaped aluminum.  Here the aluminum extension has been pushed into place in the accessory tip. Use a piece of sheet aluminum -- like the thin sheet type sold in hardware stores, or the thin aluminum craft packs sold in art and craft stores -- and shape it into a cone. You can either leave the small end round, or slightly flatten the small end of the aluminum cone so it forms a slot shape. This makes it more versatile, as it allows you to aim it precisely on a small area at one time.  The entire assembly together and ready to kick it. With the aluminum cone up into the cone attachment for the heat gun, the nozzle attachment is pressed in place on the end of the heat gun, so that it fits tightly over the nozzle of the heat gun. Now you have a tapered and shaped cone tip for directing the heat to specific areas.  Applying heat to a very small area on a plastic model horse's leg to correct a fault in the bend if the leg.  I'm only assuming, mind you, that the same procedure can be used on the little rubber tires. I would first make a solid jig from brass rod or wooden dowel, to fit into the center of the tire in place of the wheel drum. Heat the tire, press it as flat as you want it, then immediately dunk it in cold water, or hold it under running cold water from your faucet. You never know ... it just might work! I know using my heat gun, with its aluminum direction tip, enables me to alter not only the 1/9 scale Breyer plastic horses, but also HO scale horses! I've already turned necks and heads. Now here, I have to work super quick and not over heat the tiny horses or they melt in my hands ... been there, done that! That's why I'm guessing this can be applied to the little rubber tires. I hope! John. |
|
|
|
Post by cfesmire on Sept 6, 2007 21:51:35 GMT 1
Thanks John, worth a try. We'll let you know how it goes. I've tried doing it on a light bulb but again, getting consistent results is the hard part.
|
|
skunk
87thScale addict
5th B-day
Posts: 2,762
|
Post by skunk on Sept 7, 2007 7:38:33 GMT 1
Hmm... good idea about the aluminium tip. I have been using a hairdryer to bend and shape plastic, but there is a lot of waste inherent to the process, even when everything comes off as planned. I imagine that a heat gun can't cost too much. My hair dryer has by now become the property of my fiancee anyhow, so I gotta think of something better.
|
|
|
|
Post by cfesmire on Sept 7, 2007 12:12:15 GMT 1
Fiance eh? Congrats Hakån. Soon not only your hair dryer will be hers but everything you own.
|
|
skunk
87thScale addict
5th B-day
Posts: 2,762
|
Post by skunk on Sept 7, 2007 18:16:22 GMT 1
Fiance eh? Congrats Hakån. Soon not only your hair dryer will be hers but everything you own. Thanks Chester. All will be hers except for the model cars: they are of no interest to her. She doesn't really care for automobiles at all, but has expressed a like for the old 560 SEL. So at least she has good taste.  |
|
lordrusty
Novice
 Me and my adopted rescued racehorse, "Lord Rusty"; aka: "Rusty".
Posts: 5
|
Post by lordrusty on Sept 7, 2007 19:09:28 GMT 1
Luckily, hair dryers are not hot enough to heat plastics and rubber sufficiently ... if they were, everyone who ever used one would be quite short of hair! "D'oh!" Heat/paint stripper guns, are not that expensive, really. New, they're in the $25.00 to $40.00 price range. You can even find them used on eBay, for anywhere from $12.00 to $20.00. search.express.ebay.com/Home-Garden_Tools_Heat-Guns_W0QQBrand3d75b67ZBlackDecker7e712b91QQCondition441b8cfbZUsed285fddQQ_gctZ3The auto link feature is not working correctly here when I preview my message, so just copy the link and drop it in the address bar along the top of your screen. John. |
|
|
|
Post by cfesmire on Sept 7, 2007 23:04:00 GMT 1
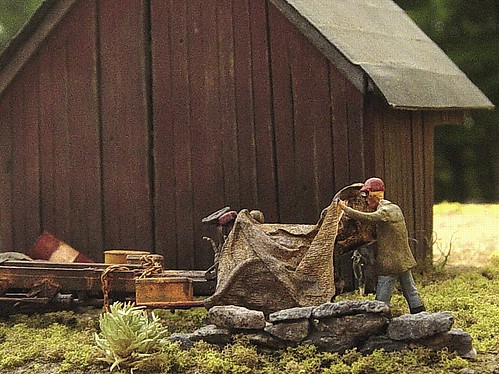
Unfortunately hair dryers ARE hot enough to melt plastic. Under this tarp is a melted Jordan Packard.  |
|
skunk
87thScale addict
5th B-day
Posts: 2,762
|
Post by skunk on Sept 8, 2007 5:19:45 GMT 1
There's plastic and there is plastic. If you hold something close enough for long enough...
|
|
BillC
87thScale addict
Posts: 2,541
|
Post by BillC on Sept 9, 2007 11:20:19 GMT 1
Chester,
If you want to model contact patches, sanding is good for hard plastic tires, but a hot screwdriver blade might do better for rubber or vinyl tires. At least it would be more controllable.
As Lee mentioned, the big problem with modeling realistic contact patches is the fact that a real tire is not only slightly flattened where it contacts a hard surface, it has a slight bulge (the rubber and air have to go somewhere). Achieving that appearance without making the tire look like it's in the process of going flat could be pretty tough.
Anyway, good luck, whatever method you choose!
Bill C.
|
|