Post by cfesmire on Feb 2, 2008 20:43:34 GMT 1
Scratch building a clapboard styrene structure
Displaying our models in a realistic setting brings them to life. It validates them as if they had more of a reason to exist than just part of a collection. Here’s a reasonably easy (considering the modeling talents seen here) way to create a structure for a display diorama. Probably the hardest aspect of creating anything scratch built is getting started. Hopefully I can get you past this quickly and easily.
I found it easiest to look at existing buildings to get accurate sizes and proportions and there may even be an actual structure you would like to replicate. I show two different buildings in progress here. One is a small 10’ x 20’ boathouse and the other is a waterfront warehouse. After you’ve decided on the basic structure size, translate those measurements to real numbers For instance, if I want a building that will have a footprint of 22 feet square, I would draw a 3”x3” square for the floor area. Then decide on the height, a 10’ side wall (or eave) would be very close to 1 5/16” tall. So draw two walls 1 5/16” x 3”. Then draw two more but add the gable (peaked section) to the top of the second two walls.
BASIC BUILDING DRAWING
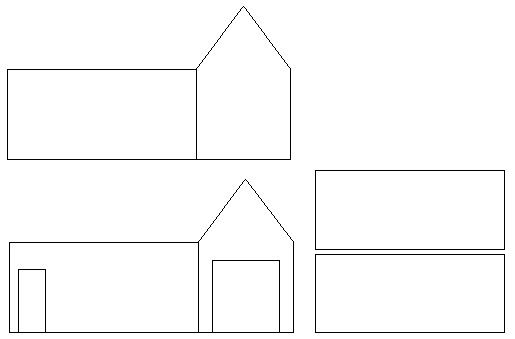
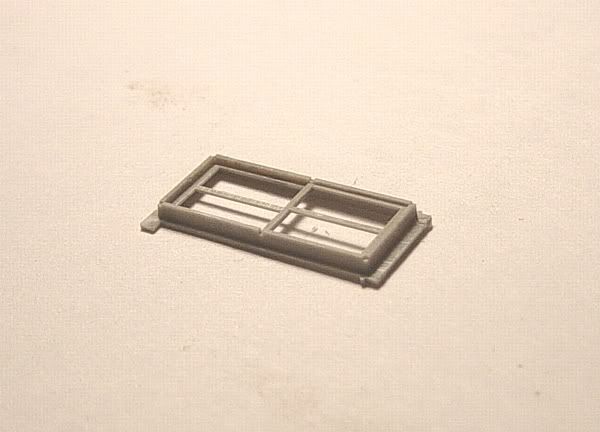
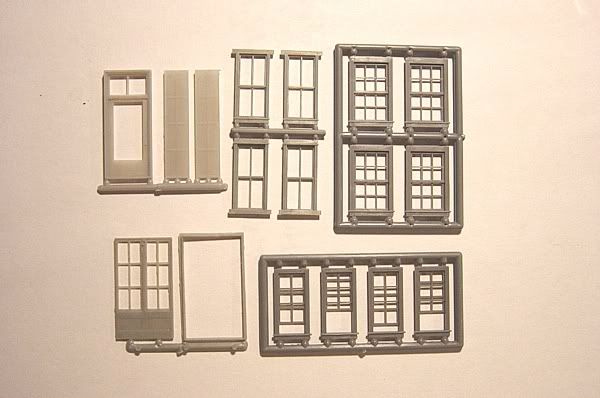
You now have a four sided building that you can print out on manila stock, which I have never had a problem with getting through my ink jet printer. Before I print and cut them out however, I size and place the windows and doors, and figure out how big the roof will be and draw it as well. I have been using the Tichy windows and doors but there are several outfits that produce nice injected molded pieces, Grandt Line being another. You’ll notice the inside of the windows have a flange to cover the edge of your cut.
WINDOW INTERIOR
DIFFERENT STYLES OF PLASTIC WINDOWS
Print and cut the structure out with scissors or knife and straight edge. You will now have a template for cutting out the structure in styrene. I make two copies of the structure in Manila and tape the second one together for a mock up to use to help with the composition of the overall diorama.
CARDSTOCK MOCK UP

Styrene clapboard siding is available in our scale as sheets from Evergreen and Plastruct as well. I use a plastic model solvent glue or Tenax 7 for most of this. Cut the sheet (making sure the clapboards face in the correct direction) to the four wall templates you have cut out. Next step is to glue .060 square stock rod to the edges of the two end gables, leave long and trim to the angle of the roof and bottom when dry. Then glue the same square rod to the gable rake (the angled part of the wall where it meets the roof). You will need to make a plumb cut at the ridge (peak) so they meet, leave long at the bottom and trim later. It is at this point that you can glue the four walls together making sure to let dry square. You have corner boards and trim already done. I glue windows in place at this time but you may paint them first if so desired. For the larger doors that I have none available commercially, I use .080” x .015” strips and glue them inside the opening for a jamb and on the outside for trim.
BOATHOUSE GLUED
WAREHOUSE GLUED
For a roof you have several options. There are a variety of commercially available types of roofing from asphalt shingles and cedar shakes to corrugated tin. In both instances here I have used a thin brass sheet that I scribed lines on the under side to replicate a standing seam roof. Another quick and effective roofing would be a 600 or finer, wet sandpaper cut into 3’ strips and glued directly to the cardstock roof you have printed to represent a tar paper roof. Let the strips run long, trim when dry and hit the edge with a bit of dark paint (I use a black Sharpie pen) to cover the raw paper edge. Brace this type of roof with some thin strips of wood to prevent curling.
Foundations are another part of the building with options. Evergreen sells a brick pattern that can simply be cut slightly smaller than the structure and glued to it. I have found that the old linoleum tiles can be cut into blocks for a granite looking foundation. Of course sitting right on the ground can be acceptable for many structures. Remember that if you plan to leave a door open a floor will be necessary if you can see into the building. Styrene boxcar siding makes a good wood floor as does.... well, wood.
FINISHED WAREHOUSE WITH GRANITE FOUNDATION
Painting and finishing is another whole story in itself but suffice it to say that I paint everything a dark color first so that if I weather the exterior, I don’t have white styrene showing through anywhere. So that’s it. Not really that hard nor is it extremely time consuming.
FINISHED BOATHOUSE
Displaying our models in a realistic setting brings them to life. It validates them as if they had more of a reason to exist than just part of a collection. Here’s a reasonably easy (considering the modeling talents seen here) way to create a structure for a display diorama. Probably the hardest aspect of creating anything scratch built is getting started. Hopefully I can get you past this quickly and easily.
I found it easiest to look at existing buildings to get accurate sizes and proportions and there may even be an actual structure you would like to replicate. I show two different buildings in progress here. One is a small 10’ x 20’ boathouse and the other is a waterfront warehouse. After you’ve decided on the basic structure size, translate those measurements to real numbers For instance, if I want a building that will have a footprint of 22 feet square, I would draw a 3”x3” square for the floor area. Then decide on the height, a 10’ side wall (or eave) would be very close to 1 5/16” tall. So draw two walls 1 5/16” x 3”. Then draw two more but add the gable (peaked section) to the top of the second two walls.
BASIC BUILDING DRAWING
You now have a four sided building that you can print out on manila stock, which I have never had a problem with getting through my ink jet printer. Before I print and cut them out however, I size and place the windows and doors, and figure out how big the roof will be and draw it as well. I have been using the Tichy windows and doors but there are several outfits that produce nice injected molded pieces, Grandt Line being another. You’ll notice the inside of the windows have a flange to cover the edge of your cut.
WINDOW INTERIOR
DIFFERENT STYLES OF PLASTIC WINDOWS
Print and cut the structure out with scissors or knife and straight edge. You will now have a template for cutting out the structure in styrene. I make two copies of the structure in Manila and tape the second one together for a mock up to use to help with the composition of the overall diorama.
CARDSTOCK MOCK UP
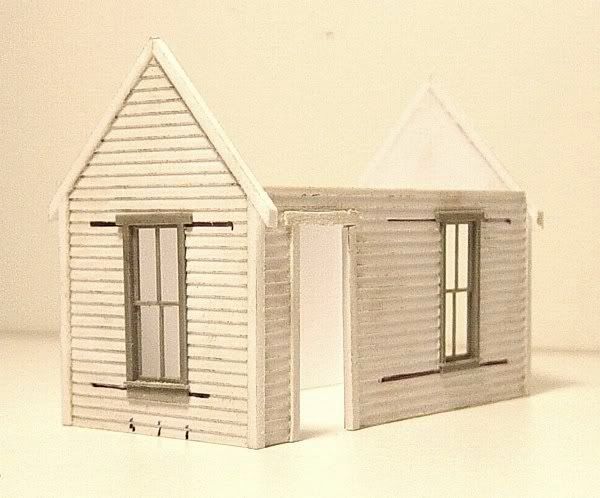
Styrene clapboard siding is available in our scale as sheets from Evergreen and Plastruct as well. I use a plastic model solvent glue or Tenax 7 for most of this. Cut the sheet (making sure the clapboards face in the correct direction) to the four wall templates you have cut out. Next step is to glue .060 square stock rod to the edges of the two end gables, leave long and trim to the angle of the roof and bottom when dry. Then glue the same square rod to the gable rake (the angled part of the wall where it meets the roof). You will need to make a plumb cut at the ridge (peak) so they meet, leave long at the bottom and trim later. It is at this point that you can glue the four walls together making sure to let dry square. You have corner boards and trim already done. I glue windows in place at this time but you may paint them first if so desired. For the larger doors that I have none available commercially, I use .080” x .015” strips and glue them inside the opening for a jamb and on the outside for trim.
BOATHOUSE GLUED
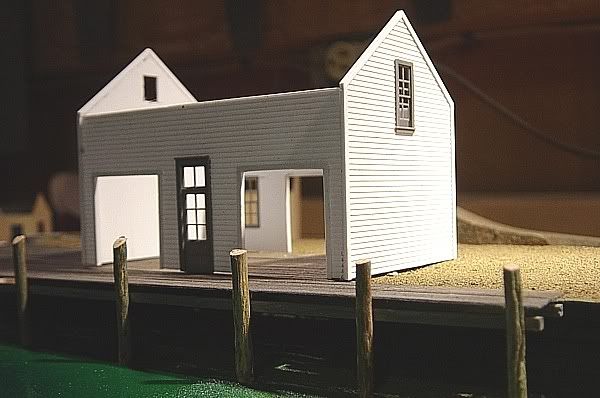
WAREHOUSE GLUED
For a roof you have several options. There are a variety of commercially available types of roofing from asphalt shingles and cedar shakes to corrugated tin. In both instances here I have used a thin brass sheet that I scribed lines on the under side to replicate a standing seam roof. Another quick and effective roofing would be a 600 or finer, wet sandpaper cut into 3’ strips and glued directly to the cardstock roof you have printed to represent a tar paper roof. Let the strips run long, trim when dry and hit the edge with a bit of dark paint (I use a black Sharpie pen) to cover the raw paper edge. Brace this type of roof with some thin strips of wood to prevent curling.
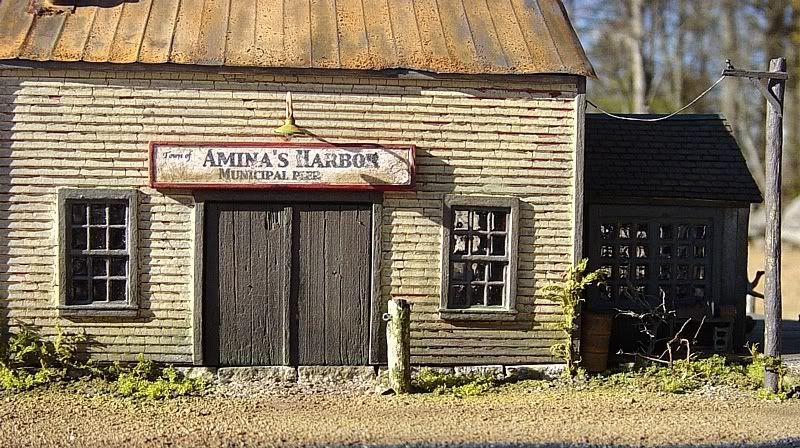
Foundations are another part of the building with options. Evergreen sells a brick pattern that can simply be cut slightly smaller than the structure and glued to it. I have found that the old linoleum tiles can be cut into blocks for a granite looking foundation. Of course sitting right on the ground can be acceptable for many structures. Remember that if you plan to leave a door open a floor will be necessary if you can see into the building. Styrene boxcar siding makes a good wood floor as does.... well, wood.
FINISHED WAREHOUSE WITH GRANITE FOUNDATION
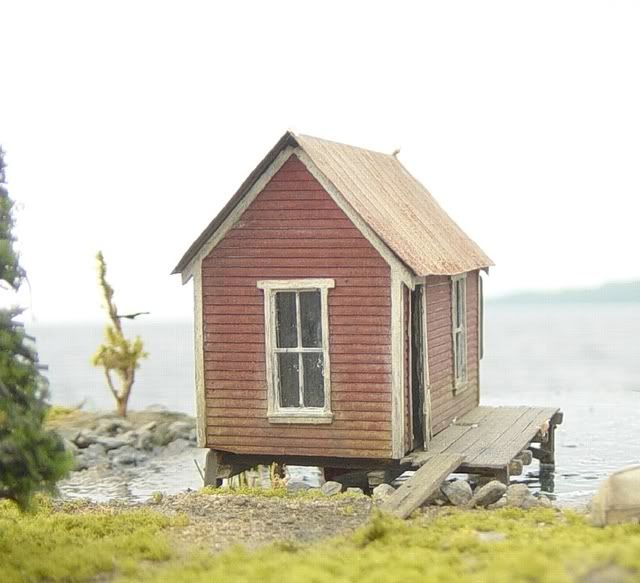
Painting and finishing is another whole story in itself but suffice it to say that I paint everything a dark color first so that if I weather the exterior, I don’t have white styrene showing through anywhere. So that’s it. Not really that hard nor is it extremely time consuming.
FINISHED BOATHOUSE